
Hi guys!
I thought I’d try something new to keep you all up to date with what’s happening behind the scenes, so I’ve decided to start blogging the process. I don’t know if this will have a name but we’ll just call it a dev diary.
So.. I’ve been putting off dealing with the whole map situation for a while now. It’s a bit annoying when you struggle with imposter syndrome so once I had run out of smaller tasks I knew it was time to start the bigger stuff.
The map has a few problems when it comes to how it will actually be used, first of all it’s a single map… that’s great for designers as they’ll have a much better time when making tweaks and creating new content but for the user, that’s a giant file which needs to be downloaded… and worse yet, loaded.
Attempting to load it attempt it all into memory has it’s issues, the user will need a lot more memory to run the game and also instantiating that memory takes time, there’s many ways to approach that, preloading the asset, multithreading the instantiation, but none of that is an actual solution and more of a bandaid fix that’ll unravel later.
It’s time for research… Obviously we’ll need to split the map up into smaller chunks so that’s a good starting point! Let’s take a look at how we can accomplish that…
What if we take a minecraft approach? We have a small playable area and load the map around the player to pad out the viewport and fill up the void that’d appear if there was no terrain to render. That could work… we’d end up serving maps that are the relevant small chunks out of a grid that’s the entire map.
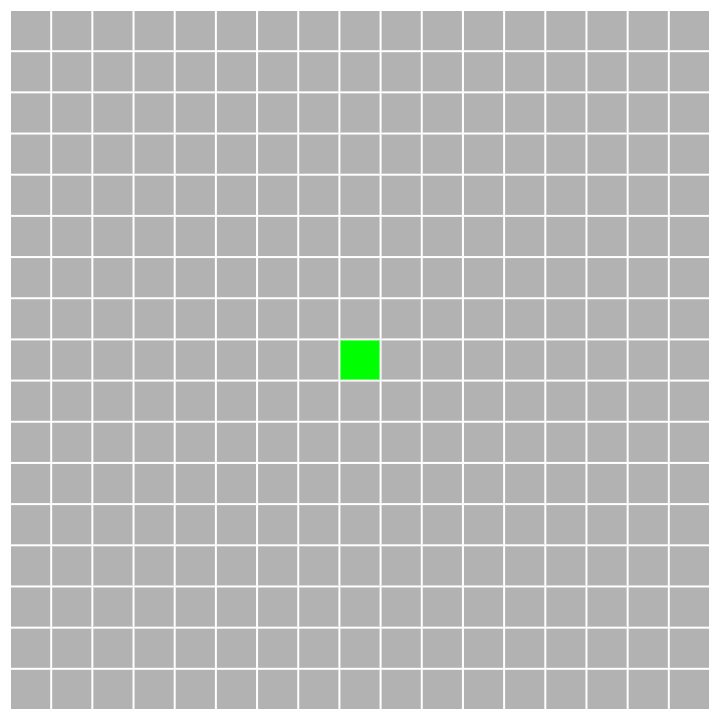
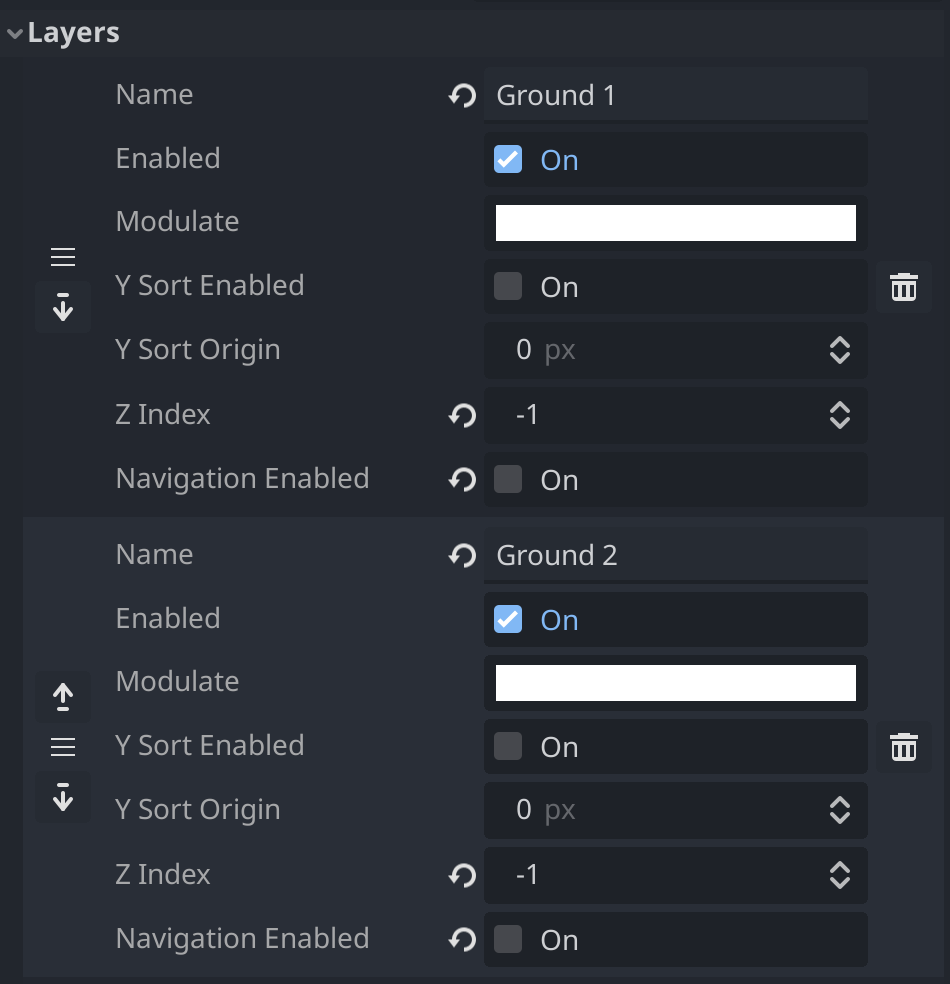
So let’s look at what a TileMap is made of in Godot. First of all it’s made up of a grid of tiles, we know that much as each tile is a 16x16 texture placed into one of those cells. So where are these tiles stored? They’re stored in separate layers, these can be used to separate the tiles into their own little groups to have more control over how they’re rendered, does a house render over or under a player? What about the roof? This dictates that.
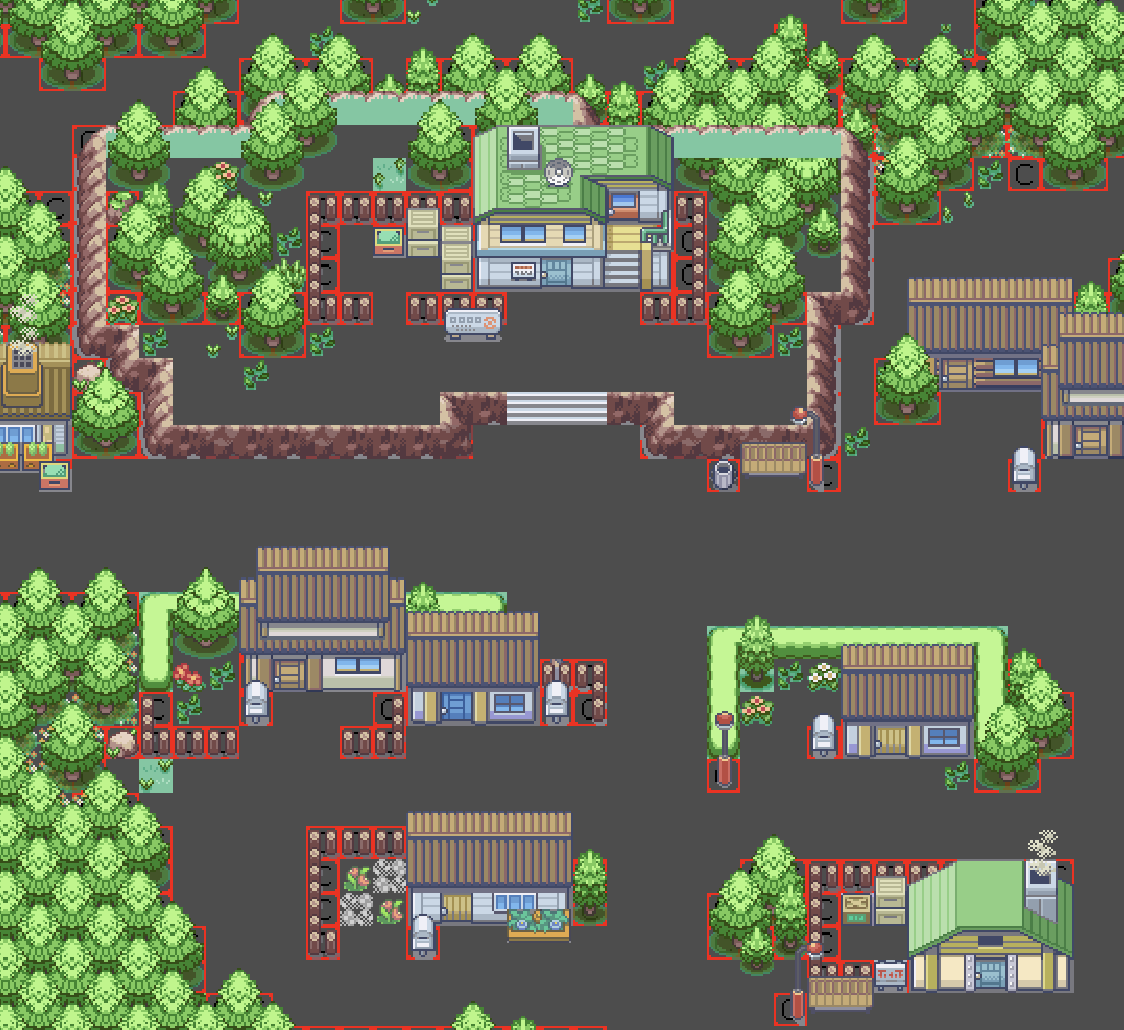
Disabling the Ground 1 layer will demonstrate this, you’ll see things that are usually obscured such as the collision and event flags set up around the map.
So what can we do with this information and how can we use this to achieve our goal? Let’s start by figuring out how small we want the chunks to be. We’ll start off with a 32 x 32 chunk, we should probably loop over the entire map in 32 x 32 sections and pull the information out like that.
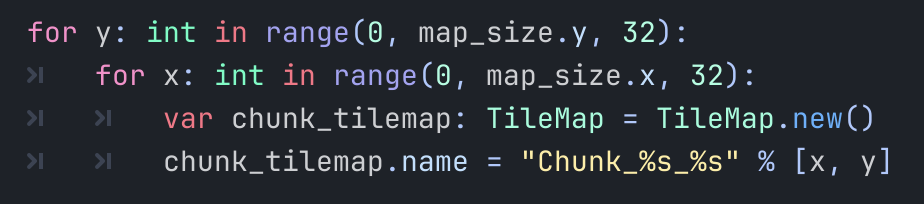
This will do exactly that, looping over the entire map in sections of 32, we know from that point we are probably ready to access its information so we’ll create a new TileMap to store it all in. This will output a bunch of blank 32 x 32 tilemaps, progress!
Let’s actually make these actually look like chunks of the map though, we should probably loop through the layers of that section, doing this we can simply copy the data from the layer over to a new layer containing its data that tells us about its properties, like its name or z-index for example..
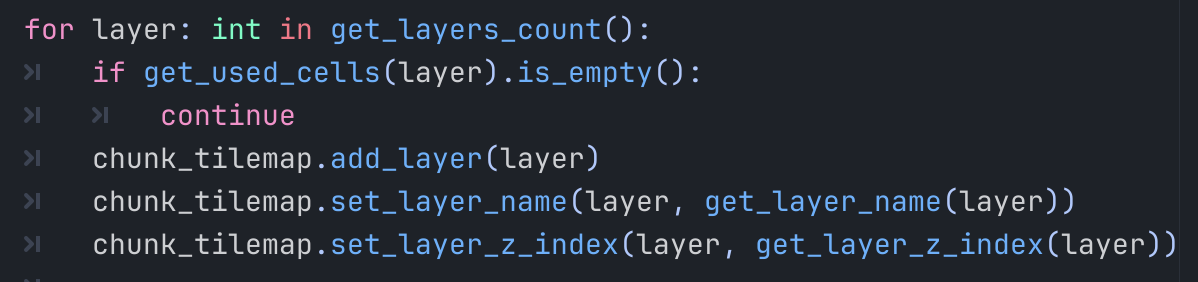
Nice, we now have all of the layers that our map is made up of, ultimately most of the layers won’t be used in each chunk as I’m sure a chunk of water won’t need to contain information for buildings or bridges so we can skip that.
Let’s populate these layers with the actual tile information, inside of each layer, we’ll loop through each tile to fill up our 32 x 32 chunk, we can access each individual cell in the layer using this.

The reason we have x + x1 and y + y1 is that our outer x and y loop isn’t being used to loop through each tile, we’re using that to set an offset for each chunk. So we’ll use that as a starting point and add our current tiles position to it relative to the chunks starting point.
So we have our cells data in the current layer we’re looping over, how can we copy this over to our chunk? We’ll check that the cell is valid first of all, then we’ll reference our local chunk_tilemap object we’ve made and use the set_cell function. We have all of the data so let’s do this.
What is set_cell expecting us to pass into it? Let’s read the Godot documentation and find out.

We have this information from the cell, let’s give it a try, we’ll get our current layer that we’re looping through as we’ve shown above, and we also have the coordinates as that’s our x1 and y1 loop we’ve made to loop through the 32 x 32 chunk, we’ll store this in a Vector2. Cool!
What about source_id and atlas_coords? Well we have that information available to us through the get_cell_source_id function, we just pass in the layer we’re on and the coordinates of the cell and we’ve got that information, the same can be applied to the atlas coordinates also, remember we’re using x + x1 and y + y1 as we’ll need to read this information from the actual TileMap.

So does this work? Let’s find out, let’s save this in a format that’s similar to our current TileMap, we’ll create a PackedScene, this is generally how most things are stored when we need to use them later, we’ll pack this TileMap we’ve created into the scene and create the path we’ll be saving our map to, it should come out looking like “res://chunks/overworld/m_0_0.tscn”.
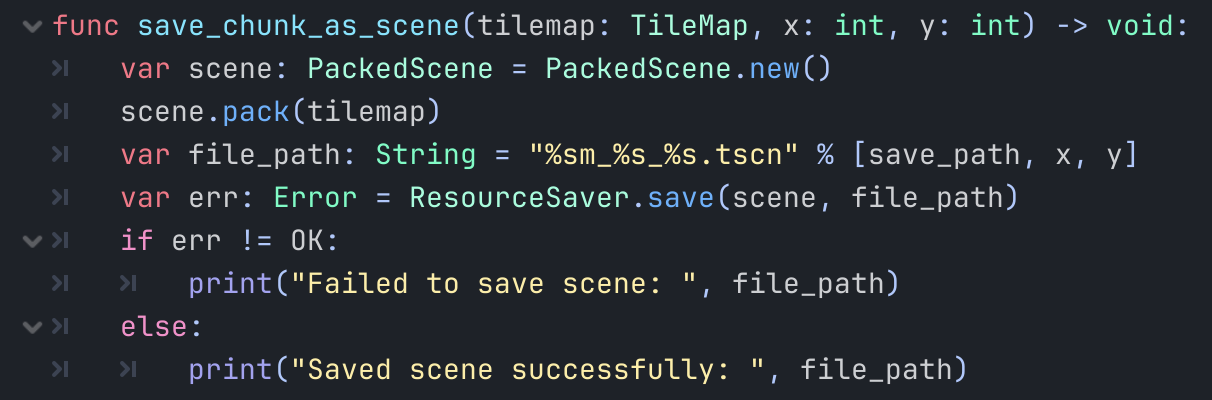
And it does, we’ve looped over the map and saved it into chunks, let’s open one and see.. Oh it’s blank, why is that? Well, let’s talk about that.
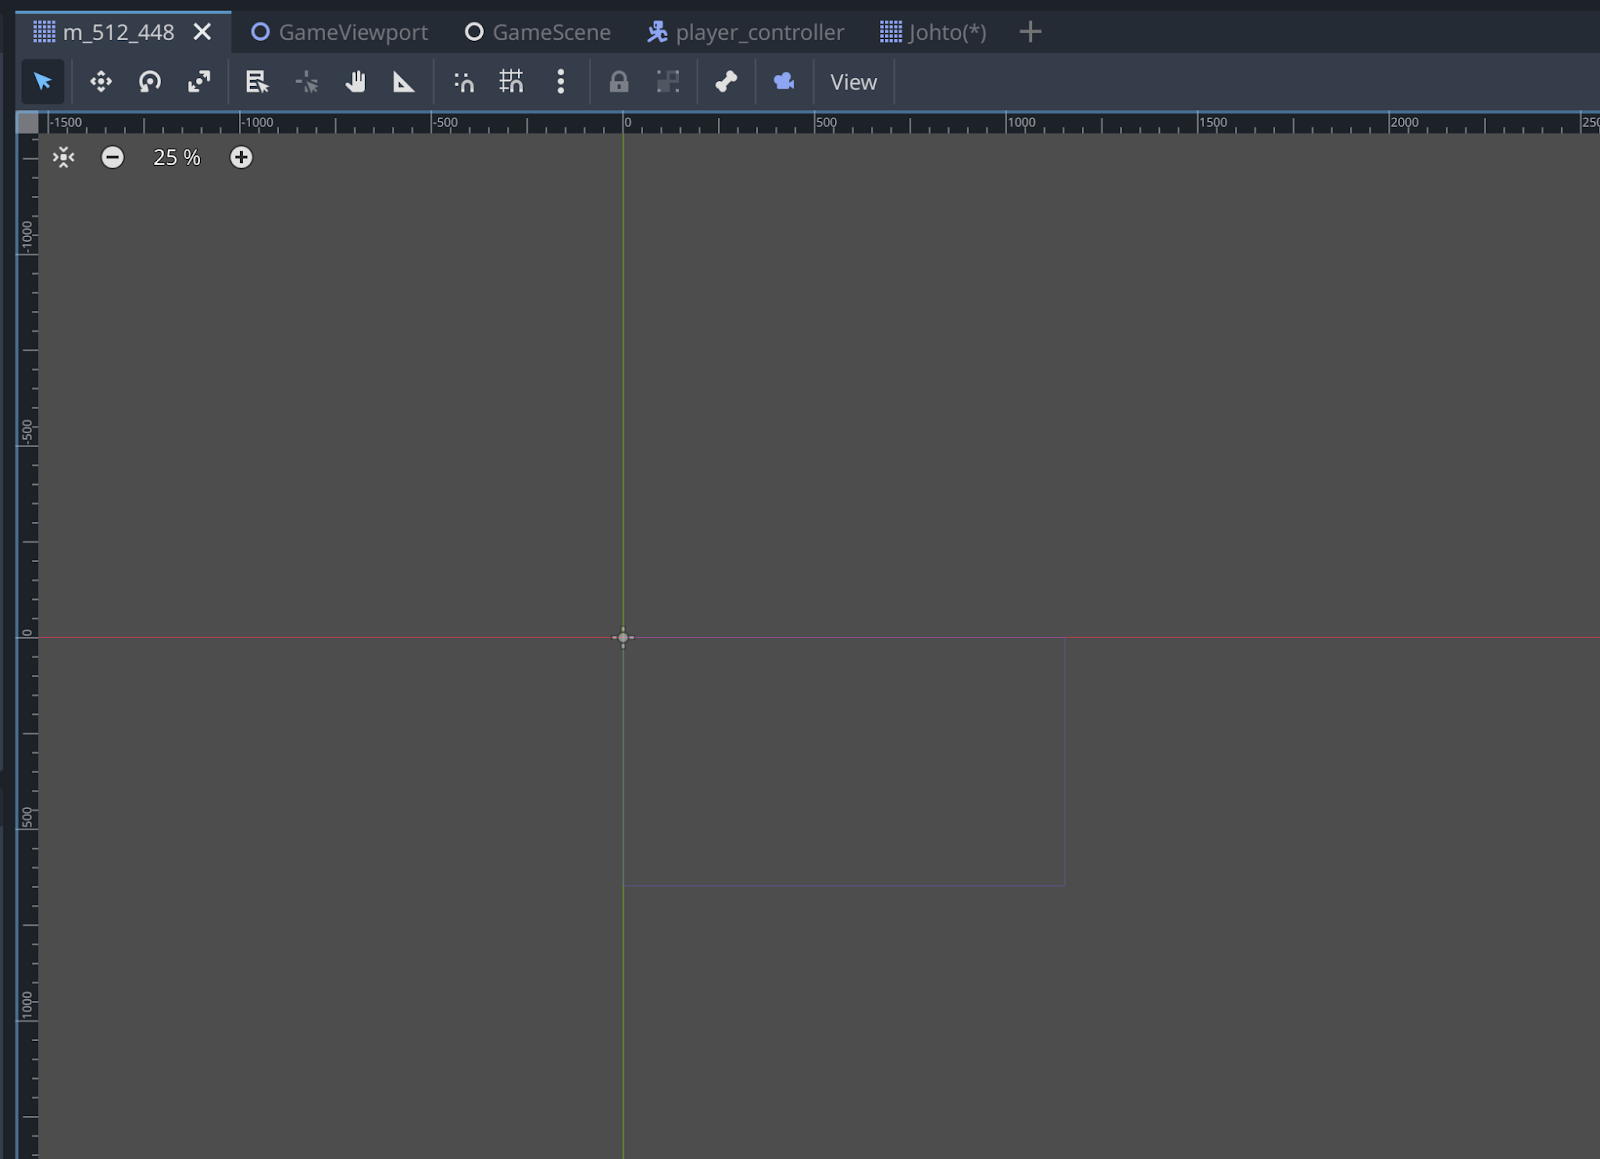
Godot TileMaps are REALLY unoptimized when they’ve been imported from something like Tiled, we’ve passed in our Cell Data which is great, but we haven’t passed in a way to use this data to access the sprites (we’ll go over that some other time).
We could copy the TileSet that was exported with it but that’s copying over the ENTIRE map’s information, this is problematic as we don’t need all of that extra information inside of the map file. So we’ll need to separate that, thankfully this is a matter of creating a global reference to its TileSet instead of passing in the TileSet along with the rest of the data earlier. Doing this, we’ve made our map files drop from 3.1 MB each, to 15 Kilobytes. I’m not good at maths so excuse me if this is wrong but that’s over 99% smaller.
That means our entire map that was previously loading up to a gigabyte in memory and would’ve taken around 10 seconds to instantiate has been compressed down to around 13 megabytes total. Even better, the player won’t need all of this data so they’ll only be fetching around 130 kilobytes of data to fill up their viewport. Awesome, let’s give it a reference to the TileSet and see what it produces.
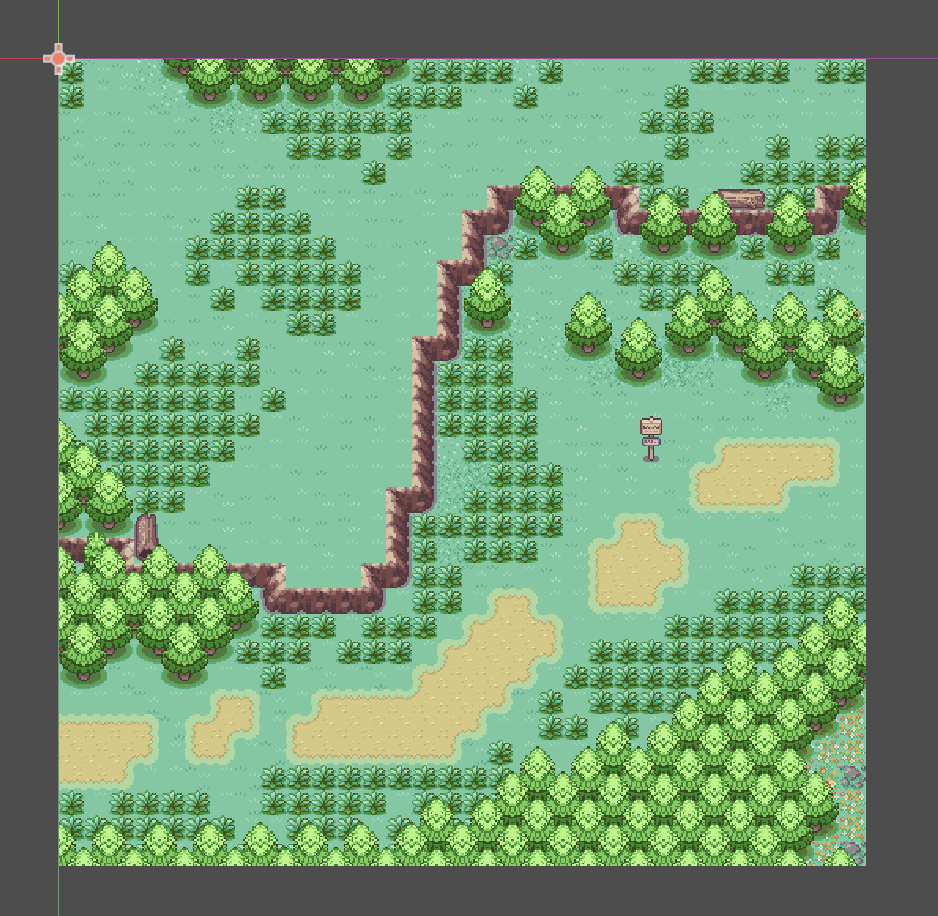
It’s a chunk of the map (outside New Bark Town), and it has the original layers!
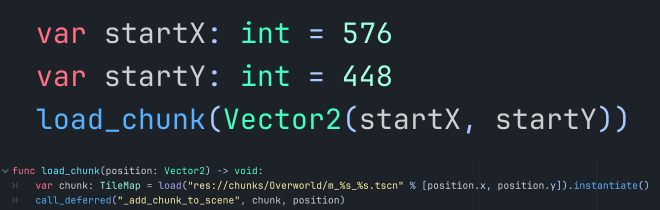
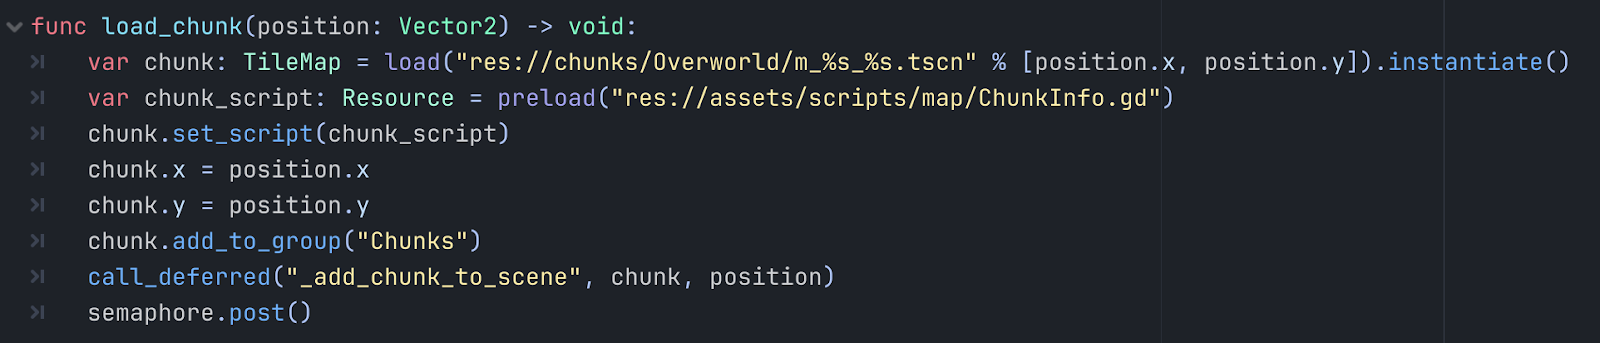
So we have all of the map split into little chunks, how can we actually put these in game around our player? Let’s start by creating a script that’ll be responsible for loading chunks. Let’s define a starting area for now, we’ll just pick New Bark Town’s chunk for simplicity's sake. We’ll load the file we had saved earlier and instantiate it, instantiating something brings it to life, let’s add it to the scene.
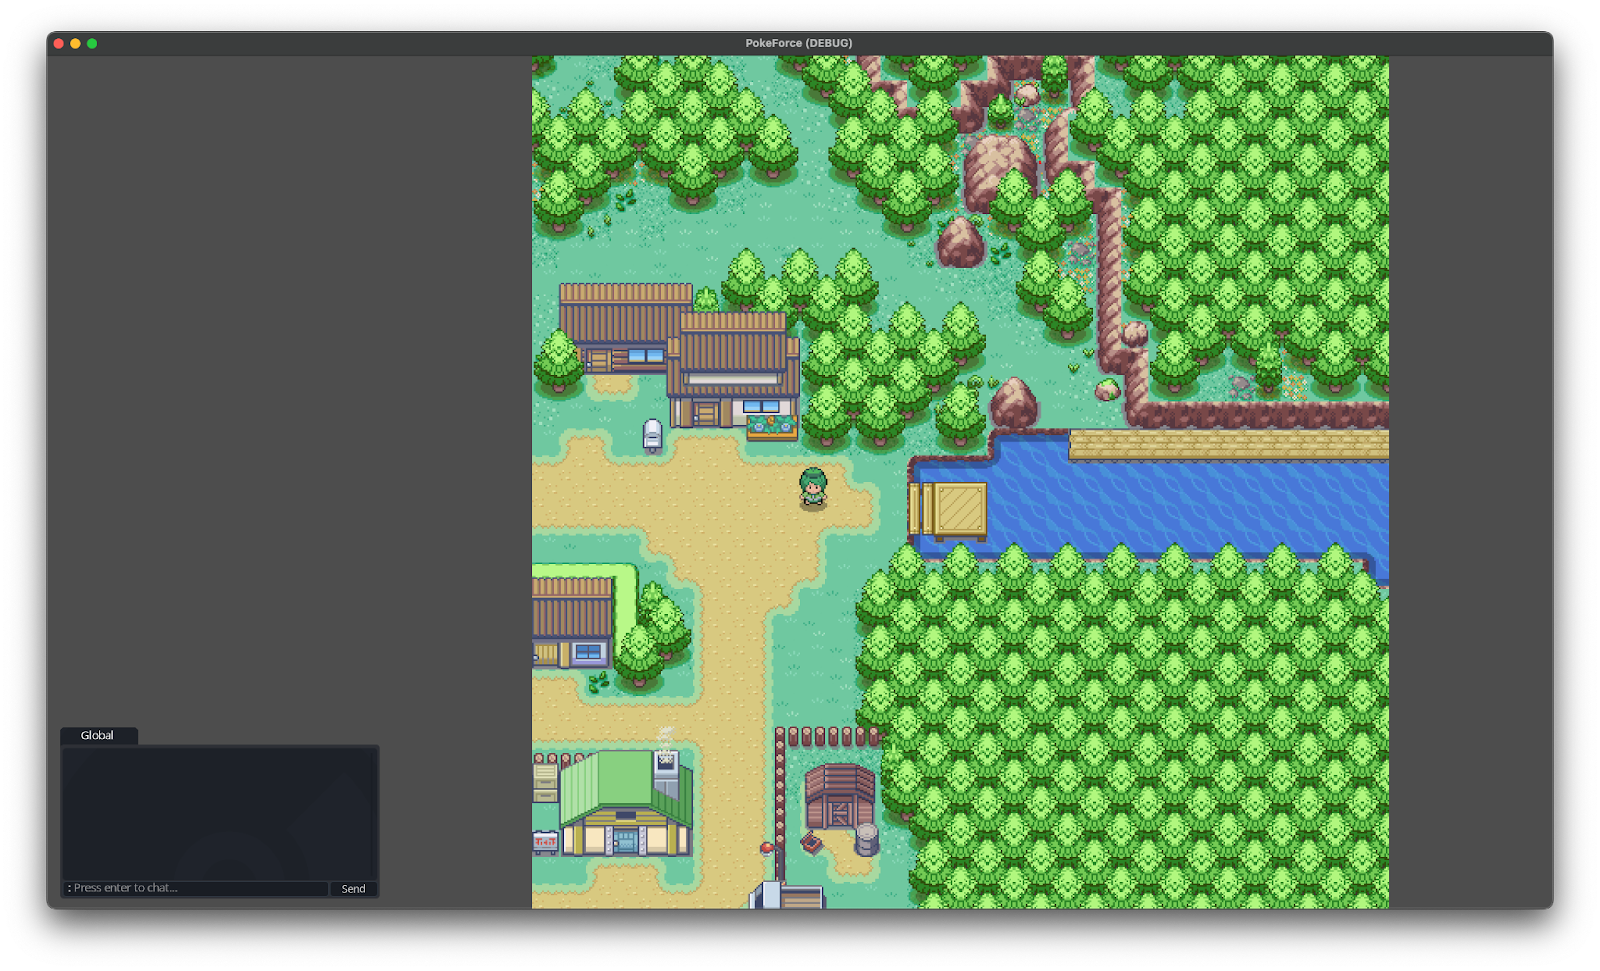
Let’s hit play, and to my surprise… it actually worked! We can run around and play in this tiny chunk! Knowing this, let’s figure out how we can load the chunks adjacent to this playable one so we can eventually explore the entire map.
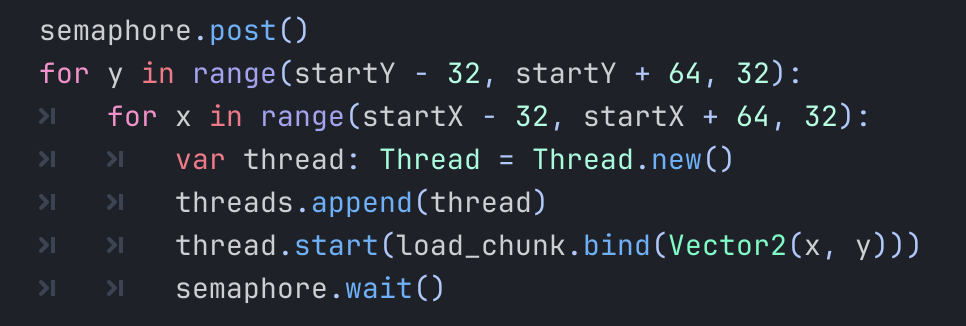
So we know chunks are in 32 x 32 grids, and this will be the centre, so we’ll need the map that’s to the left of the player, so that’s -32 and to the right, that’s +32, we can do this on the Y-axis too to fill out the areas above also. We should end up with a 3x3 playable area, let’s use semaphore to multithread some of it, that way we can still play while it’s performing this in the background.
And let’s check it out in game… it’s loaded with the surrounding chunks!
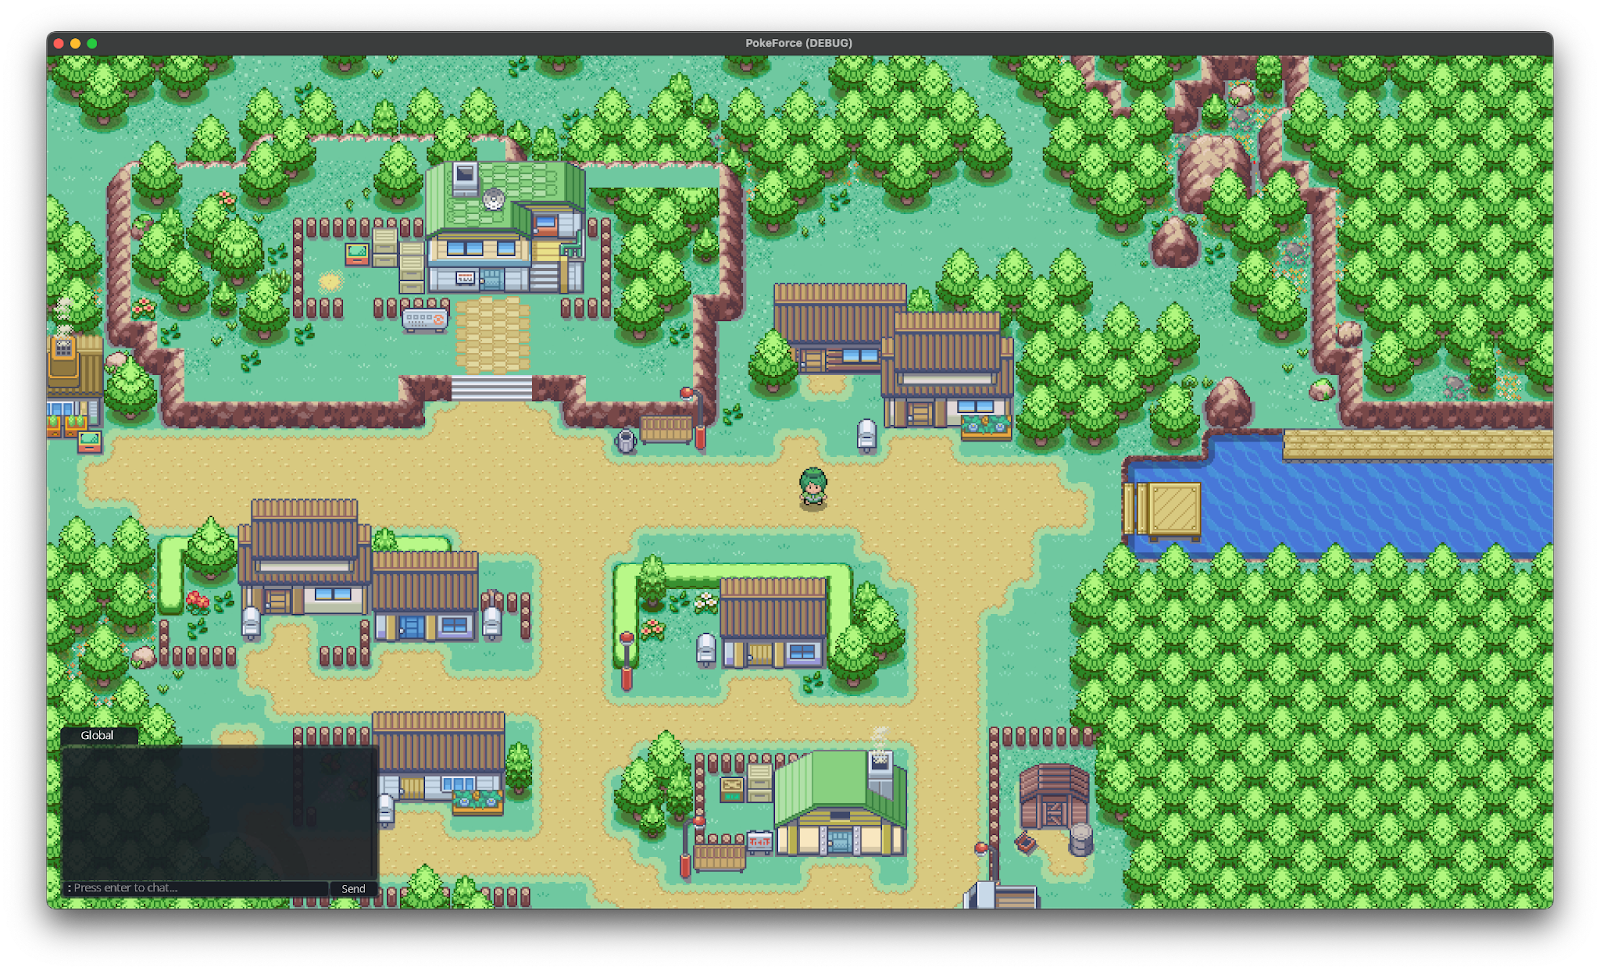
What does it look like when you’re zoomed out? Well, it’s a portion of the map that’s big enough to not ruin immersion!
Now that we have the logic for this down, we now need to add in the logic for rendering new chunks when we walk too close to the edge, that way we can explore the whole map without walking into the grey void.
Let’s start with the facts, we’ll need to do this when we get too close to the edge of the chunk, we get closer to the edge when we move closer to it… so let’s add some logic to our player movement to handle this.
First we’ll modify our chunk loader, we’ll add our generated chunks to a group called “Chunks” so we can reference them later easily, we’ll also create a script that stores the chunks position.
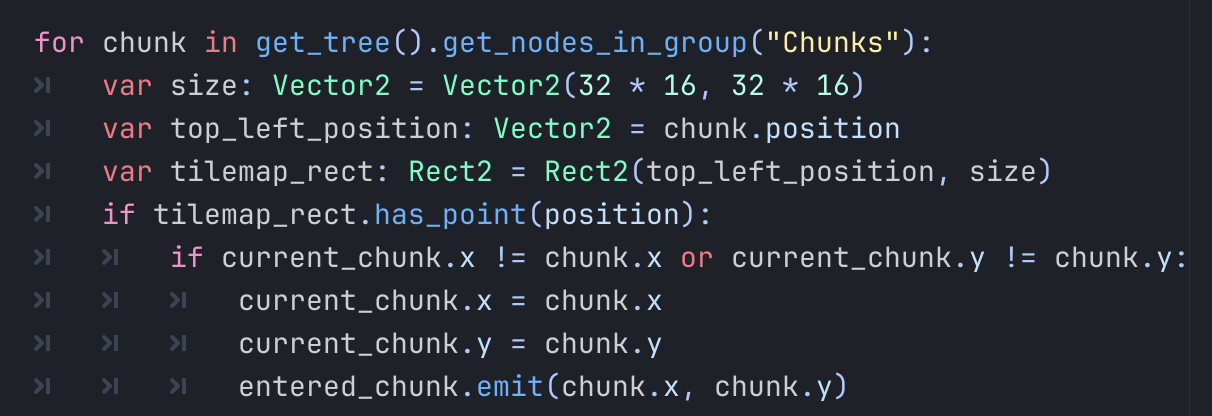
Now, let’s loop through the chunks, we’ll define some variables that help us pinpoint our current position, size defines the size of the map, they’re 32 x 32 chunks consisting of cells that are 16 x 16, we’ll get the chunks current position in the world and use that as our anchor point. Now let’s use Rect2 to create an area within the game to use as a check. It’ll be an invisible rectangle that’s positioned where the chunk is, and is the size of the chunk.
We can use has_point to check if our player’s position is within the Rect2, which is being checked in a 3x3 grid positioned over each chunk. If the player is within that Rect2, that also means it’s within the chunk! So let’s grab that chunk_pos information we set above and use that to determine which tiles to load.
We’ve created a signal called entered_chunk which we’ll emit with the information about the chunk we’ve been detected in, we’ll add a check to make sure we are only doing this when we’ve entered a chunk that’s different from our old one.
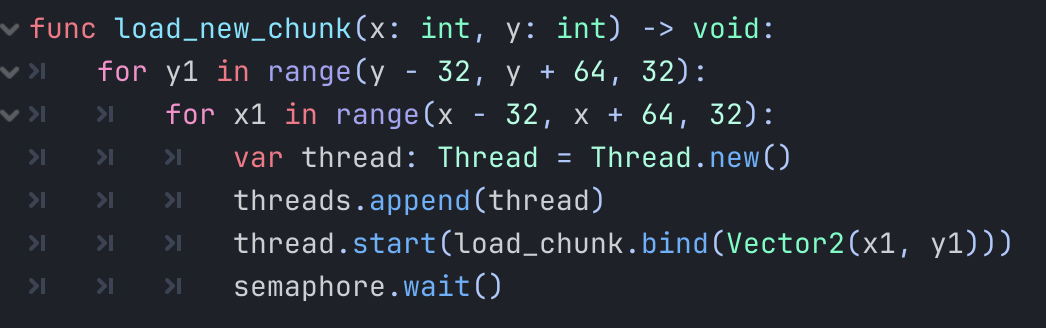
Let’s head back to our ChunkLoader script we made, we’ll create a new function that connects to our signal we made, everytime the signal is emitted it’ll call this function with the chunk_pos information passed into it, now we’ll do something similar to our original loop except using the new chunk position and let’s test it out.
Let’s move around.
And it’s loading them! Job done, almost. This is perfectly playable until we load a whole bunch of chunks… the problem is this will keep them in the Scene and after a while, memory usage will slowly creep up and performance will degrade. So let’s add in some logic to remove any unused chunks as we load the new ones.
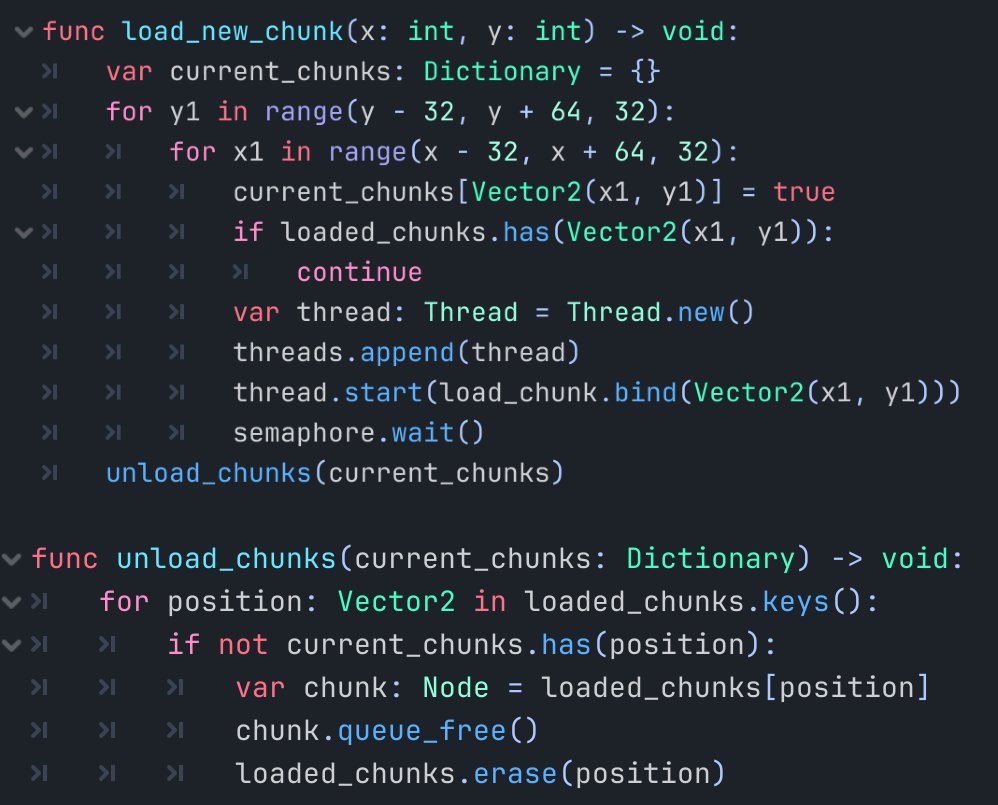
Okay cool, we’ll keep track of our current chunks and compare them to our loaded chunks, and if it’s outside of the 3x3 adjacent chunks, we’ll erase it from the scene, freeing up memory and keeping the game running great.
Let’s give this a try, here’s a view of it unloading the chunks around it and a view of how it looks to play.
And it’s looking good! We’ll leave it here for now, but we’ll be able to do more such as serving our maps through a file server to keep things nice and tight.
I hope you’ve enjoyed the insight into a task that I thought was going to be hell but turned out to be a lot easier than I expected, research can go a long way.
Let me know if you’d like more little blogs like this in future, as I love keeping you all involved in the process, also I’ve yet to see anyone document this knowledge online so feel free to apply what you’ve learnt!
Take care everyone!
I thought I’d try something new to keep you all up to date with what’s happening behind the scenes, so I’ve decided to start blogging the process. I don’t know if this will have a name but we’ll just call it a dev diary.
So.. I’ve been putting off dealing with the whole map situation for a while now. It’s a bit annoying when you struggle with imposter syndrome so once I had run out of smaller tasks I knew it was time to start the bigger stuff.
The map has a few problems when it comes to how it will actually be used, first of all it’s a single map… that’s great for designers as they’ll have a much better time when making tweaks and creating new content but for the user, that’s a giant file which needs to be downloaded… and worse yet, loaded.
Attempting to load it attempt it all into memory has it’s issues, the user will need a lot more memory to run the game and also instantiating that memory takes time, there’s many ways to approach that, preloading the asset, multithreading the instantiation, but none of that is an actual solution and more of a bandaid fix that’ll unravel later.
It’s time for research… Obviously we’ll need to split the map up into smaller chunks so that’s a good starting point! Let’s take a look at how we can accomplish that…
What if we take a minecraft approach? We have a small playable area and load the map around the player to pad out the viewport and fill up the void that’d appear if there was no terrain to render. That could work… we’d end up serving maps that are the relevant small chunks out of a grid that’s the entire map.
So let’s look at what a TileMap is made of in Godot. First of all it’s made up of a grid of tiles, we know that much as each tile is a 16x16 texture placed into one of those cells. So where are these tiles stored? They’re stored in separate layers, these can be used to separate the tiles into their own little groups to have more control over how they’re rendered, does a house render over or under a player? What about the roof? This dictates that.
Disabling the Ground 1 layer will demonstrate this, you’ll see things that are usually obscured such as the collision and event flags set up around the map.
So what can we do with this information and how can we use this to achieve our goal? Let’s start by figuring out how small we want the chunks to be. We’ll start off with a 32 x 32 chunk, we should probably loop over the entire map in 32 x 32 sections and pull the information out like that.
This will do exactly that, looping over the entire map in sections of 32, we know from that point we are probably ready to access its information so we’ll create a new TileMap to store it all in. This will output a bunch of blank 32 x 32 tilemaps, progress!
Let’s actually make these actually look like chunks of the map though, we should probably loop through the layers of that section, doing this we can simply copy the data from the layer over to a new layer containing its data that tells us about its properties, like its name or z-index for example..
Nice, we now have all of the layers that our map is made up of, ultimately most of the layers won’t be used in each chunk as I’m sure a chunk of water won’t need to contain information for buildings or bridges so we can skip that.
Let’s populate these layers with the actual tile information, inside of each layer, we’ll loop through each tile to fill up our 32 x 32 chunk, we can access each individual cell in the layer using this.
The reason we have x + x1 and y + y1 is that our outer x and y loop isn’t being used to loop through each tile, we’re using that to set an offset for each chunk. So we’ll use that as a starting point and add our current tiles position to it relative to the chunks starting point.
So we have our cells data in the current layer we’re looping over, how can we copy this over to our chunk? We’ll check that the cell is valid first of all, then we’ll reference our local chunk_tilemap object we’ve made and use the set_cell function. We have all of the data so let’s do this.
What is set_cell expecting us to pass into it? Let’s read the Godot documentation and find out.
We have this information from the cell, let’s give it a try, we’ll get our current layer that we’re looping through as we’ve shown above, and we also have the coordinates as that’s our x1 and y1 loop we’ve made to loop through the 32 x 32 chunk, we’ll store this in a Vector2. Cool!
What about source_id and atlas_coords? Well we have that information available to us through the get_cell_source_id function, we just pass in the layer we’re on and the coordinates of the cell and we’ve got that information, the same can be applied to the atlas coordinates also, remember we’re using x + x1 and y + y1 as we’ll need to read this information from the actual TileMap.
So does this work? Let’s find out, let’s save this in a format that’s similar to our current TileMap, we’ll create a PackedScene, this is generally how most things are stored when we need to use them later, we’ll pack this TileMap we’ve created into the scene and create the path we’ll be saving our map to, it should come out looking like “res://chunks/overworld/m_0_0.tscn”.
And it does, we’ve looped over the map and saved it into chunks, let’s open one and see.. Oh it’s blank, why is that? Well, let’s talk about that.
Godot TileMaps are REALLY unoptimized when they’ve been imported from something like Tiled, we’ve passed in our Cell Data which is great, but we haven’t passed in a way to use this data to access the sprites (we’ll go over that some other time).
We could copy the TileSet that was exported with it but that’s copying over the ENTIRE map’s information, this is problematic as we don’t need all of that extra information inside of the map file. So we’ll need to separate that, thankfully this is a matter of creating a global reference to its TileSet instead of passing in the TileSet along with the rest of the data earlier. Doing this, we’ve made our map files drop from 3.1 MB each, to 15 Kilobytes. I’m not good at maths so excuse me if this is wrong but that’s over 99% smaller.
That means our entire map that was previously loading up to a gigabyte in memory and would’ve taken around 10 seconds to instantiate has been compressed down to around 13 megabytes total. Even better, the player won’t need all of this data so they’ll only be fetching around 130 kilobytes of data to fill up their viewport. Awesome, let’s give it a reference to the TileSet and see what it produces.
It’s a chunk of the map (outside New Bark Town), and it has the original layers!
So we have all of the map split into little chunks, how can we actually put these in game around our player? Let’s start by creating a script that’ll be responsible for loading chunks. Let’s define a starting area for now, we’ll just pick New Bark Town’s chunk for simplicity's sake. We’ll load the file we had saved earlier and instantiate it, instantiating something brings it to life, let’s add it to the scene.
Let’s hit play, and to my surprise… it actually worked! We can run around and play in this tiny chunk! Knowing this, let’s figure out how we can load the chunks adjacent to this playable one so we can eventually explore the entire map.
So we know chunks are in 32 x 32 grids, and this will be the centre, so we’ll need the map that’s to the left of the player, so that’s -32 and to the right, that’s +32, we can do this on the Y-axis too to fill out the areas above also. We should end up with a 3x3 playable area, let’s use semaphore to multithread some of it, that way we can still play while it’s performing this in the background.
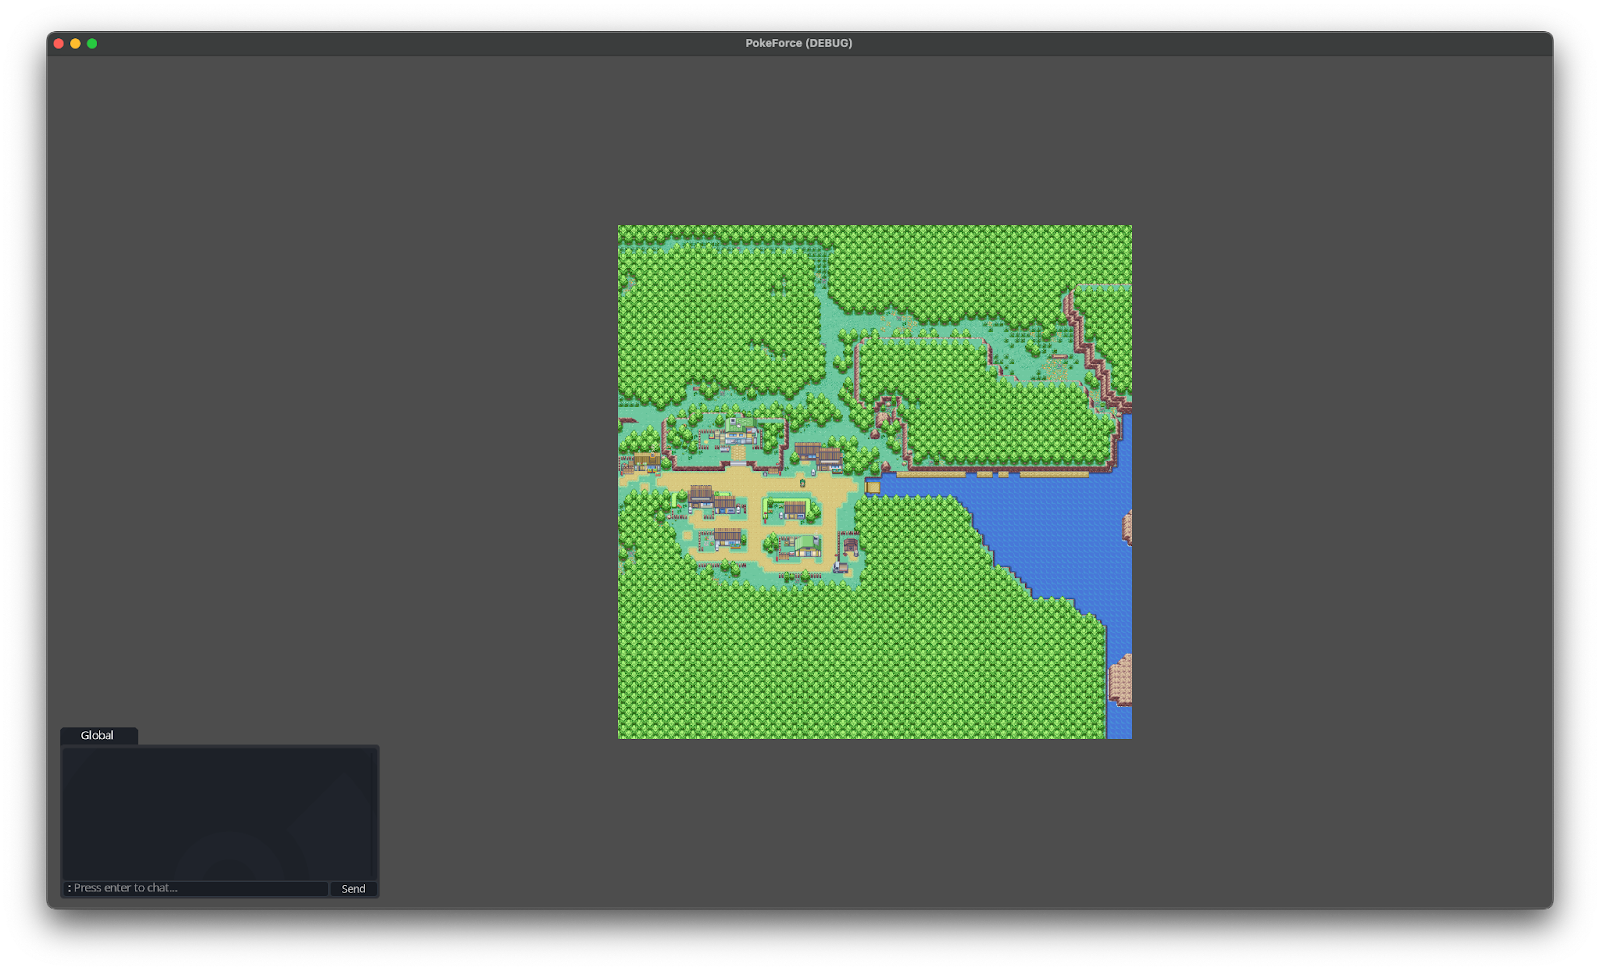
And let’s check it out in game… it’s loaded with the surrounding chunks!
What does it look like when you’re zoomed out? Well, it’s a portion of the map that’s big enough to not ruin immersion!
Now that we have the logic for this down, we now need to add in the logic for rendering new chunks when we walk too close to the edge, that way we can explore the whole map without walking into the grey void.
Let’s start with the facts, we’ll need to do this when we get too close to the edge of the chunk, we get closer to the edge when we move closer to it… so let’s add some logic to our player movement to handle this.
First we’ll modify our chunk loader, we’ll add our generated chunks to a group called “Chunks” so we can reference them later easily, we’ll also create a script that stores the chunks position.
Now, let’s loop through the chunks, we’ll define some variables that help us pinpoint our current position, size defines the size of the map, they’re 32 x 32 chunks consisting of cells that are 16 x 16, we’ll get the chunks current position in the world and use that as our anchor point. Now let’s use Rect2 to create an area within the game to use as a check. It’ll be an invisible rectangle that’s positioned where the chunk is, and is the size of the chunk.
We can use has_point to check if our player’s position is within the Rect2, which is being checked in a 3x3 grid positioned over each chunk. If the player is within that Rect2, that also means it’s within the chunk! So let’s grab that chunk_pos information we set above and use that to determine which tiles to load.
We’ve created a signal called entered_chunk which we’ll emit with the information about the chunk we’ve been detected in, we’ll add a check to make sure we are only doing this when we’ve entered a chunk that’s different from our old one.
Let’s head back to our ChunkLoader script we made, we’ll create a new function that connects to our signal we made, everytime the signal is emitted it’ll call this function with the chunk_pos information passed into it, now we’ll do something similar to our original loop except using the new chunk position and let’s test it out.
Let’s move around.
And it’s loading them! Job done, almost. This is perfectly playable until we load a whole bunch of chunks… the problem is this will keep them in the Scene and after a while, memory usage will slowly creep up and performance will degrade. So let’s add in some logic to remove any unused chunks as we load the new ones.
Okay cool, we’ll keep track of our current chunks and compare them to our loaded chunks, and if it’s outside of the 3x3 adjacent chunks, we’ll erase it from the scene, freeing up memory and keeping the game running great.
Let’s give this a try, here’s a view of it unloading the chunks around it and a view of how it looks to play.
And it’s looking good! We’ll leave it here for now, but we’ll be able to do more such as serving our maps through a file server to keep things nice and tight.
I hope you’ve enjoyed the insight into a task that I thought was going to be hell but turned out to be a lot easier than I expected, research can go a long way.
Let me know if you’d like more little blogs like this in future, as I love keeping you all involved in the process, also I’ve yet to see anyone document this knowledge online so feel free to apply what you’ve learnt!
Take care everyone!


